FAQ
- First, go to Tools & Settings. Then, choose Business Information > Website > Enter your website URL
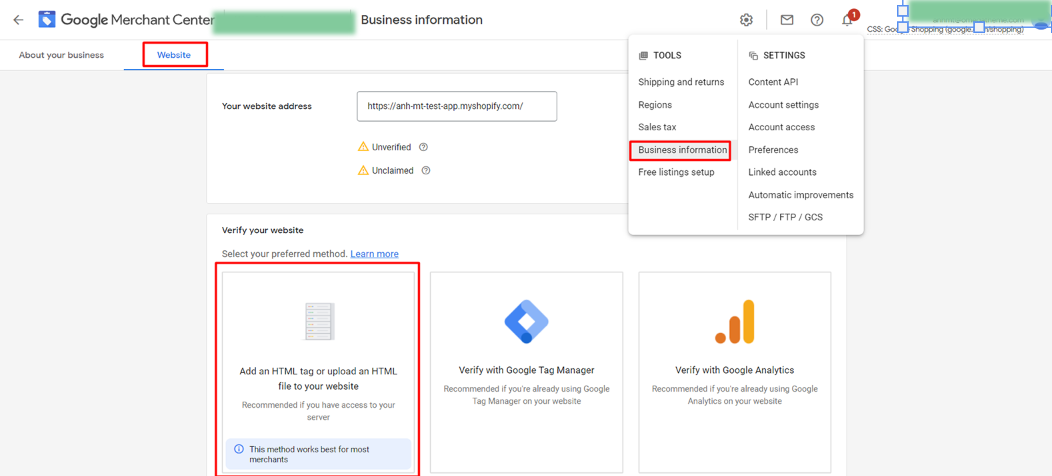
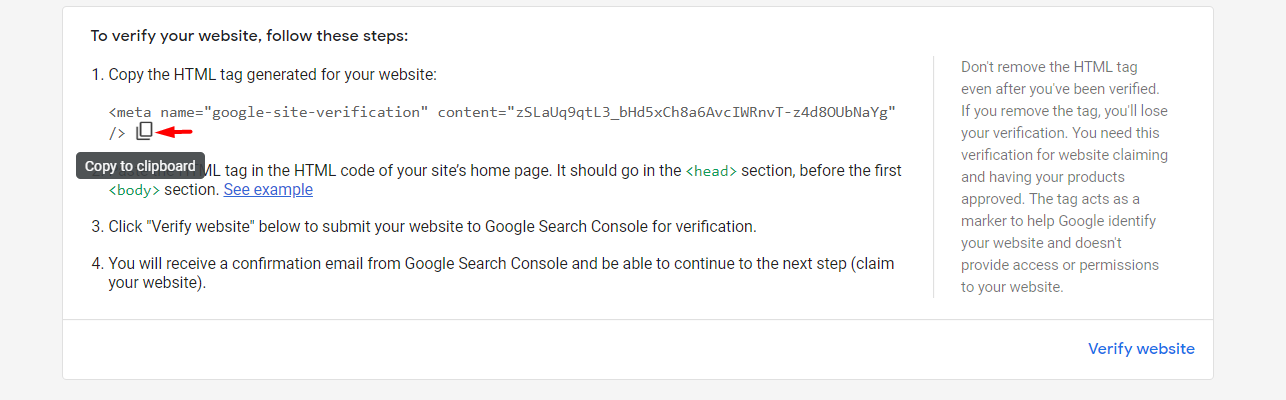
- Next, choose the first option and copy the tag
- After getting the tag, you need to log into your store. Go to Online Store > Themes. Then, on the top right corner click Actions > Edit Code.
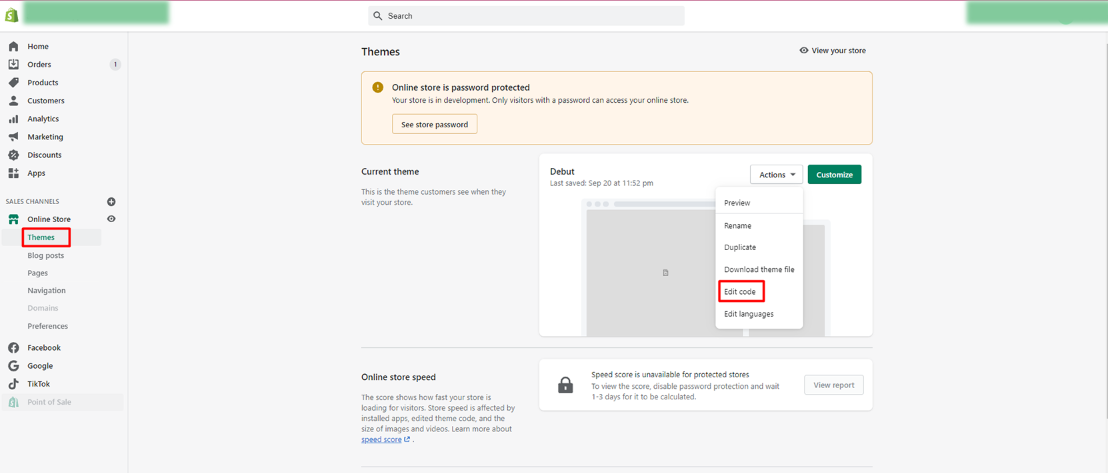
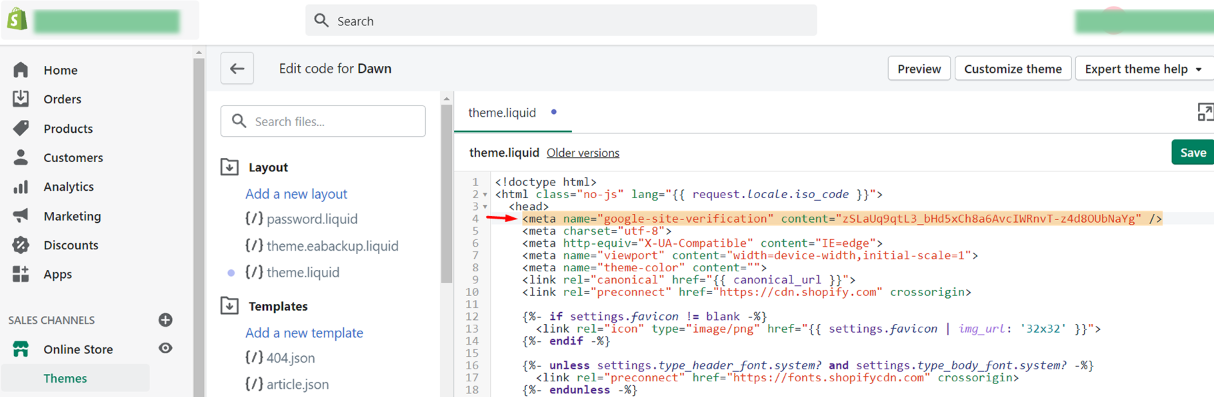
- Paste it right here in theme.liquid under the opening <head> tag, then save.
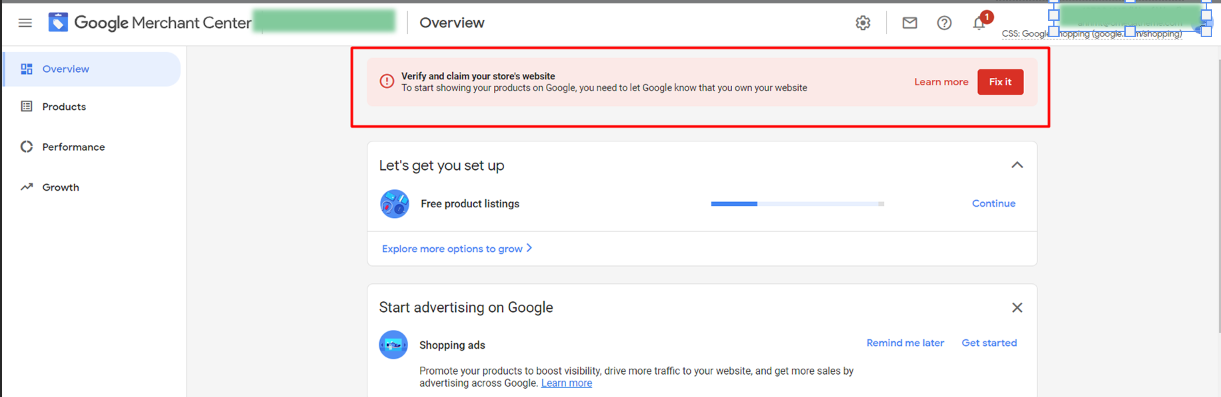
- Finally, go back to Google Merchant Center, to verify and claim your URL
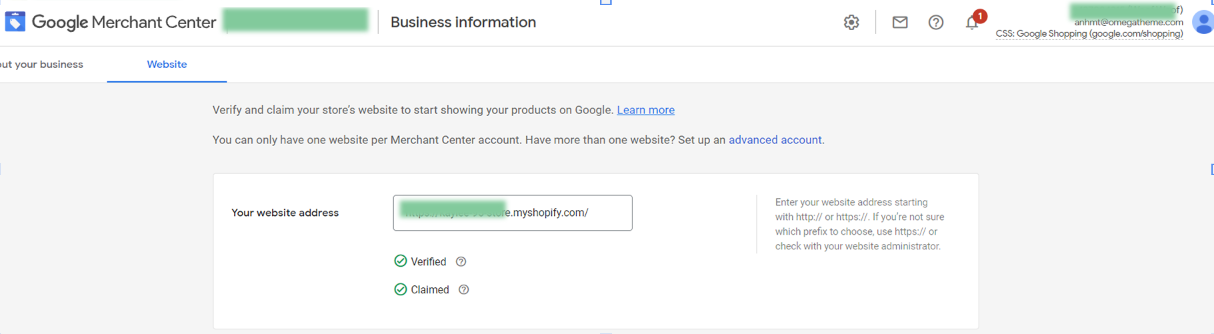
If you follow all the steps correctly, your website URL will be verified quickly and look like this. Need help? Meet us in the chat widget at the bottom-right corner!
Note: Shipping setting is a sore topic. But it's rewarding when you do it right (almost) and painful when you do it wrong. Below you'll find all the basics. (If this still doesn't help with your complicated shipping settings, contact us for support!)
- What Google wants mostly mirrors what shoppers want: The shipping cost shown on Google matches that on your landing page or at least not lower. Even better, free shipping.
- Setting up shipping services in Google Merchant has its perks: You can apply the services to all products or groups of products (more on this below)
- Same product, same country - multiple shipping services: Google will calculate and show shoppers the lowest rates.
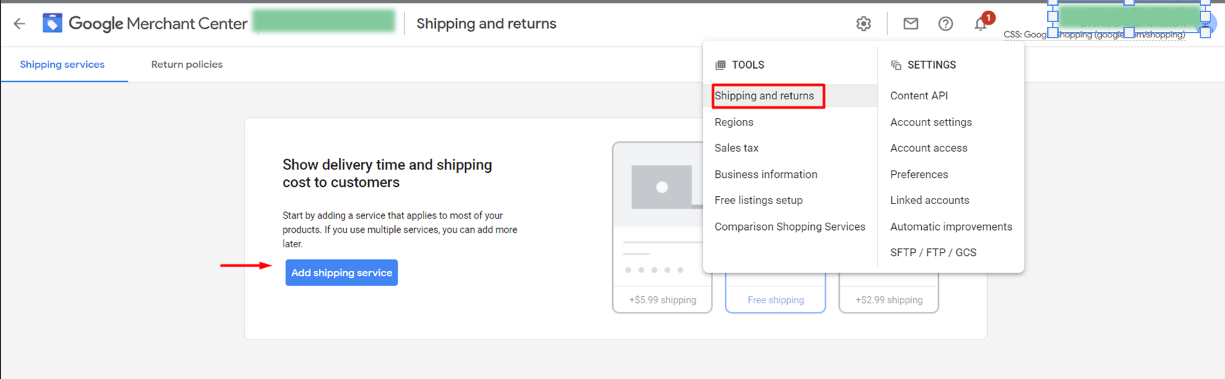
- Step 1: Service settings
Choose Shipping & Returns tab under the Tools section, then Add Shipping Service
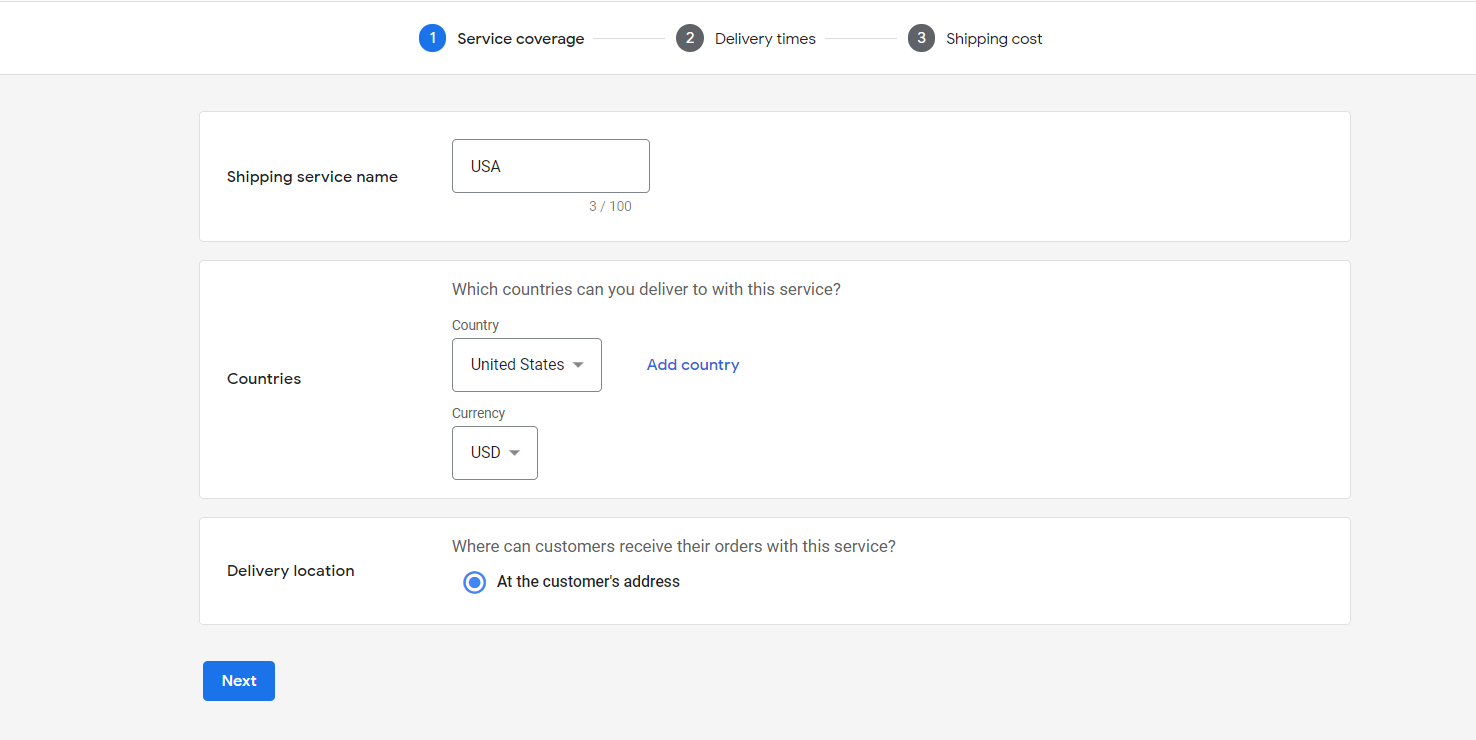
- Shipping service name: Make it distinguishable.
- Countries: It's where the products governed by this service will be headed to
- Currencies: It's those of the target countries. Make sure they also match currencies stated in your feeds
2. Step 2: Delivery time
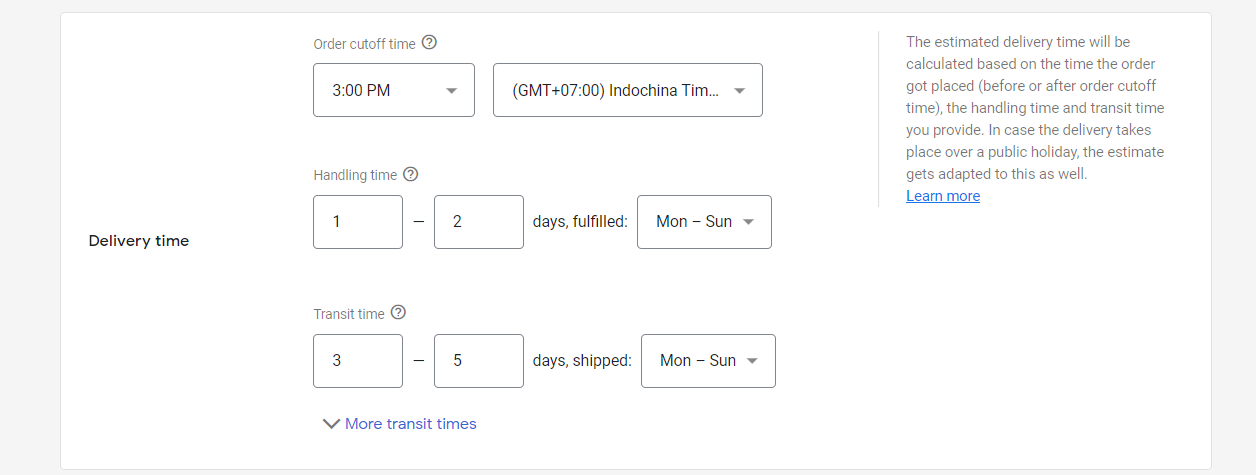
Order cutoff time: the time before which orders must be placed in order to process them on the same day.
Time zone: in which cutoff time is calculated.
Handling time: First box: Minimum business days it takes you to process an order. Same-day processing means minimum = 0
Second box: Maximum number of business days it takes you to process orders.
Transit time: add the possible range of business days this service could take (for example, 1 to 5)
More transit time: This allows you to config your shipping even more granularly based on regions in each country. Only applicable for United States, France, and Australia.
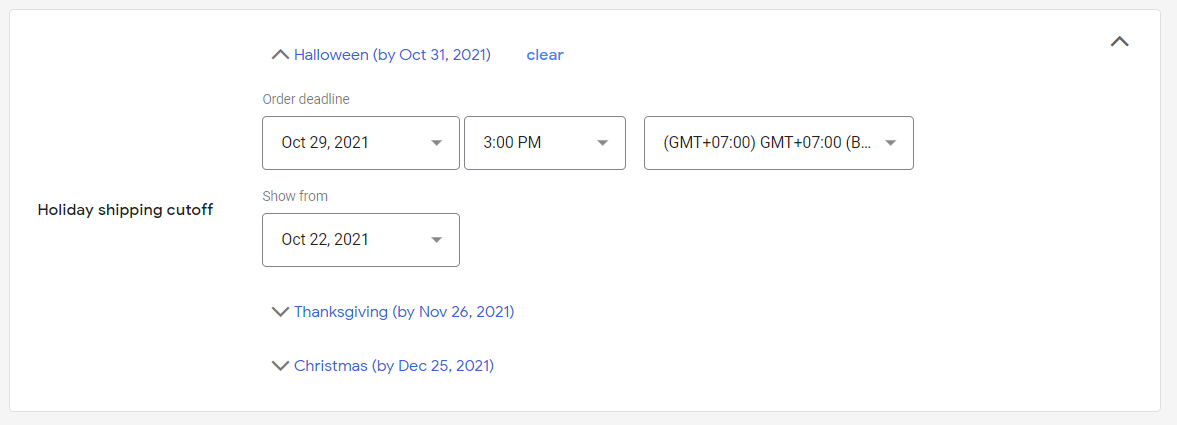
Set your holidays if needed
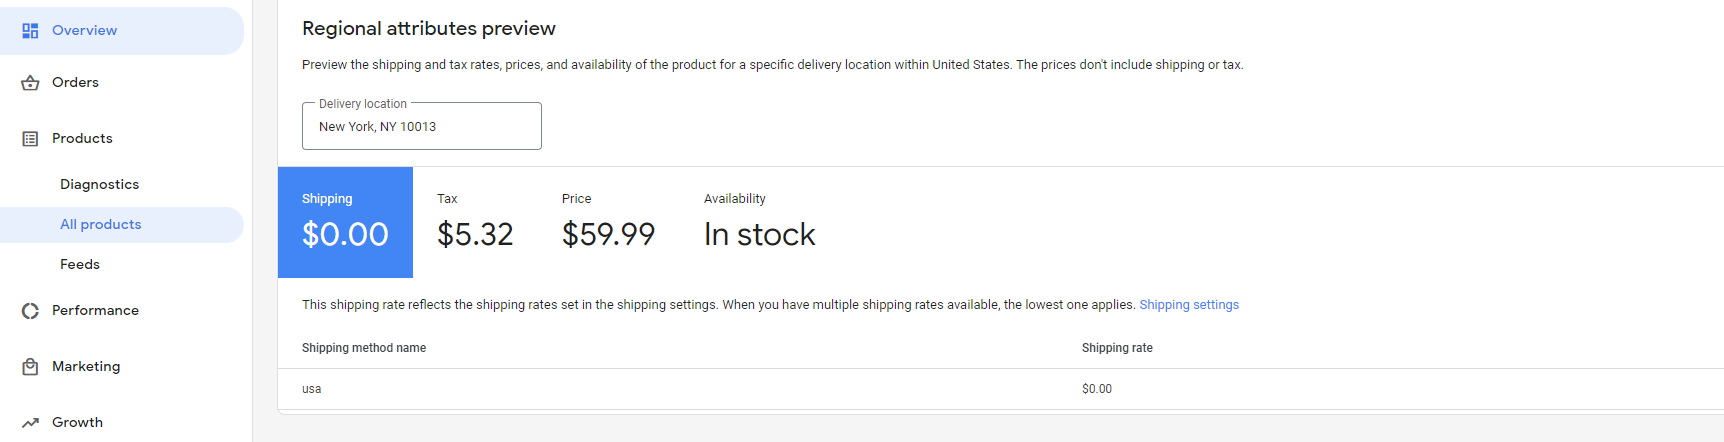
3. Step 3: Shipping rates
Once configured properly, you should be able to see the shipping setting applied to your product.
- Feeds from our app will carry the original language and currency of your Shopify product's original data. For example, if your source products are in English and priced in USD, your product feed will be in English and USD, no matter whether you're using a currency converter and/or a language app.
Note: We haven't supported multi-lingual feeds just yet.
- But you can **always add additional countries** of sale as destinations to your feed, as long as your feed language and currency are supported in your target countries of sales.
Navigate to the Content API feed in your Google Merchant
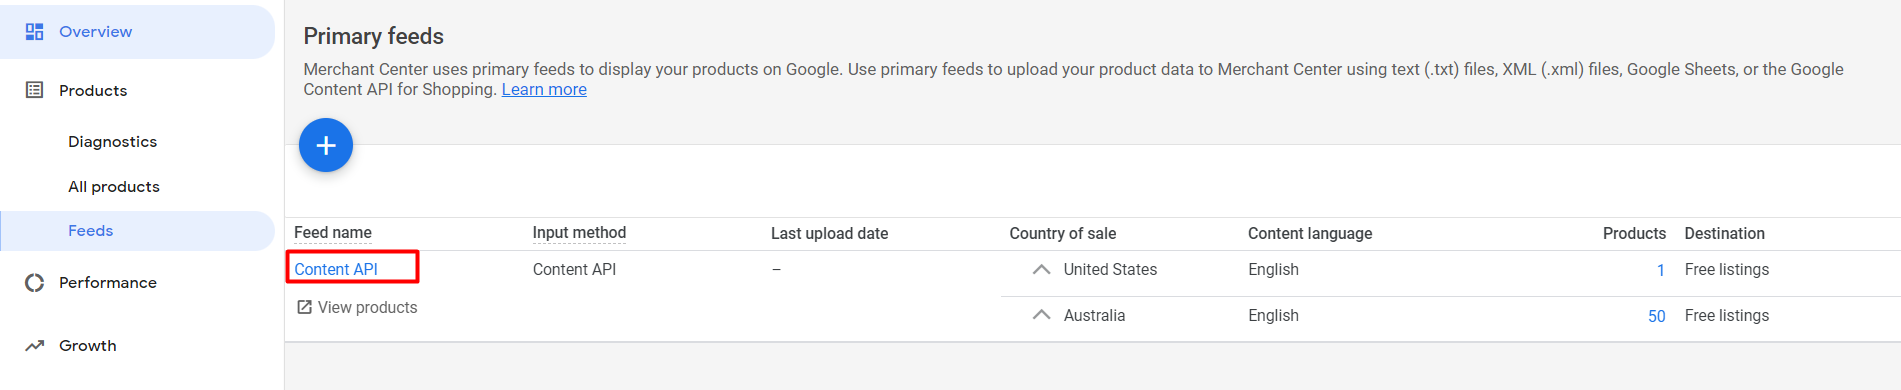
Add additional countries of sale to your existing feed(s). By doing this, Google will show your products to the target countries in your feed original language + in the currency of those countries of sale (auto-converted by Google).
They will stay there for 30 days, then they will expire. This is to keep a stable source of items if you're running any ads. But please note that syncing is not available from the moment you delete the app, so your items will remain static. Mismatch errors might happen.
Technically you don't have to. If you still want to use other functions of the app (setting up Google Ads, for example), just keep it. If you only need a tool to submit your feed, then we'd advise choosing just one app to avoid submitting duplicated items. This will also help us spot the issue from our app for you as they won't be mixed up with items from other apps! You can either disconnect your Google Merchant ID to the Google Channel app or delete it.
Yes! FeedNexa allows you to generate custom XML feed URLs that can be copied or downloaded. You can use these feed files to submit your product data to any external platform that supports XML feeds, such as affiliate networks, email marketing tools, or third-party ad platforms.
Technically no. Our app only works behind the scene, without having to load any code on your storefront, so it won't affect site loading speed. However, if you spot something unusual, just let us know so we will check!
Yes, FeedNexa provides flexible options — you can choose to include all variants or only the first variant in your feed, depending on your needs.
Yes, FeedNexa supports submitting both the original (full) price and the sale (discounted) price to your feeds. This ensures that your product listings display accurate pricing information across all advertising platforms.
Indeed it can. Our app takes the HTML format of your description from Shopify to submit to Google Merchant, so all multi-media will remain intact. This means your customers can still see all of them vividly on the Google Shopping tab.
Yes, FeedNexa supports both. The app can pull the storefront product description for customer-facing content, and also uses the SEO title and meta description fields to optimize your product feed for search engines and ad platforms.
In general settings → advanced settings, select how you want to set up the title format for each item (each item corresponds to one variant).
For example, if your main product title is School Backpack for kids and you have 2 variants for it in total (blue and green). The setting below will append the main title with the variant title, "School Backpack for kids/blue" and "School Backpack for kids/green" to submit to your Google Merchant.

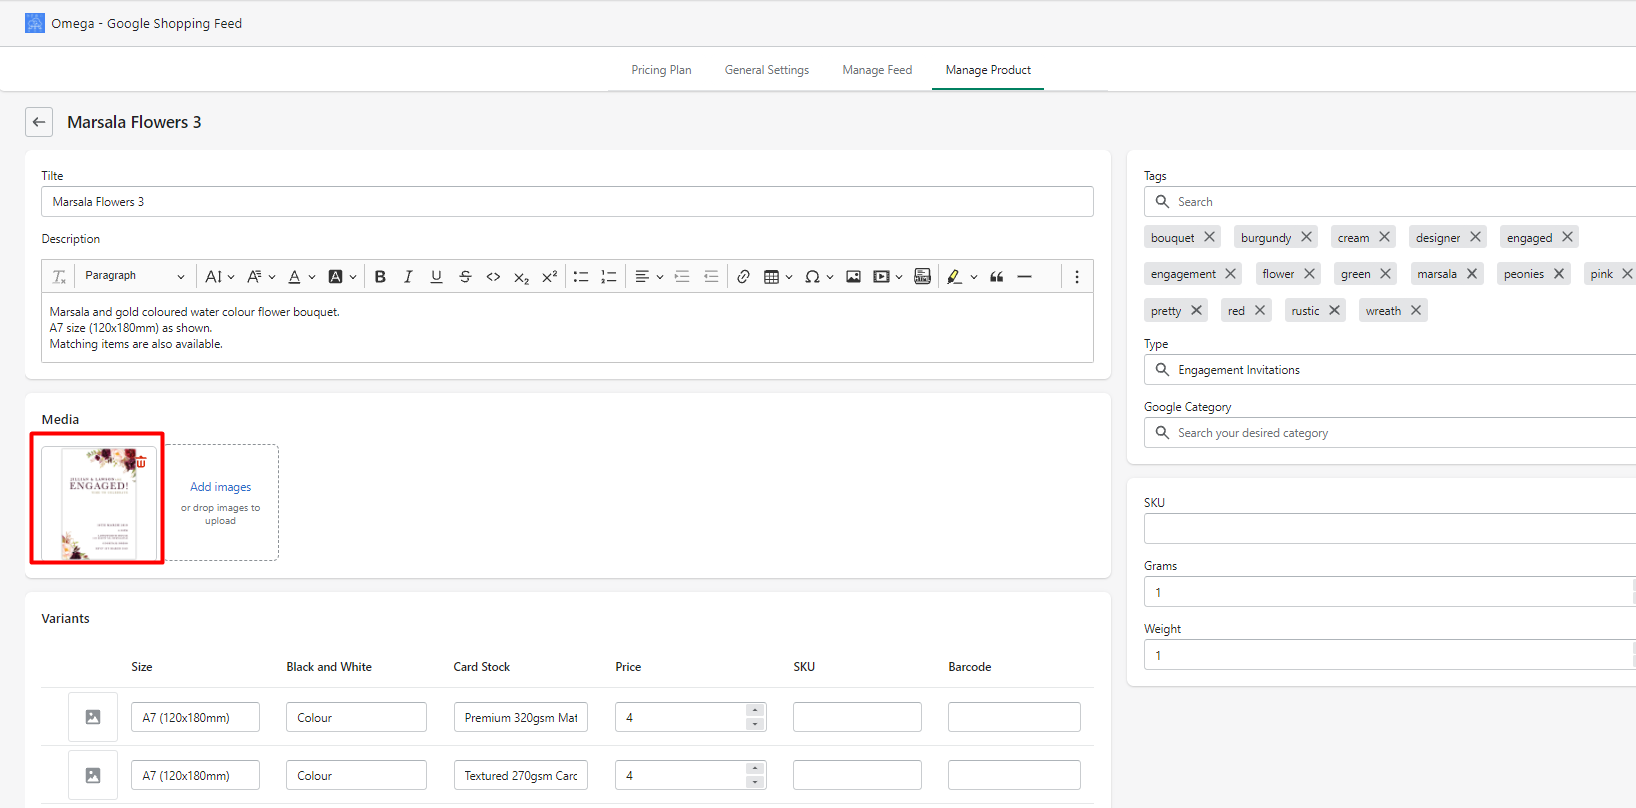
For sure! Simply go to the product that you want to change the image and just change them in-app. Changes won't be reflected in Shopify unless you allow them upon hitting "Save".
Step 1: Generate Your XML Feed in FeedNexa
- Copy the link to the XML feed created by FeedNexa.

Step 2: Log in to Google Merchant Center
- Click on ⚙️> Data source from the right-top menu.
- Click the Add product source button.

Step 3: Add Your XML Feed URL
- Choose Add products from a file
You can select the fetch frequency, use the URL that you just copied from the FeedNexa app as above, pasting it into the File URL field. Then click "Continue".

- At times, you may notice a difference in the number of products displayed in our app compared to those shown on your GMC. This is likely because the scheduled fetch time has not yet occurred, preventing Google from updating the latest changes to your feed. In such cases, you can manually click Update to synchronize the data.


- After the fetch is complete, you can view the correct number of products in the Feeds tab and check the status of each product. Please note that depending on the total number of products, this process may take a few seconds or a couple of hours.

Step 1: Go to Meta Commerce Manager
- Select the Business Account that owns your Catalog - you want to add feed
- Under Assets, choose Catalogs, then click your catalog (e.g.
FeedNexa)
Step 2: Go to the Data Sources Tab
- In the left panel, select Data Sources
- Click Product Data Sources
- Click Add Items

Step 3: Select “Data Feed” as Upload Method
- Choose: Use Data Feed
- Click Next
Make sure you have full permission to manage Catalog
Step 4: Add Your XML Feed URL
- Choose: Use a URL
- Paste your XML feed URL from FeedNexa then Next

XML feed Facebook

Confirm settings

Your XML feed is now successfully connected to Facebook Catalog.