How to Set Up Google Shopping Ads with Zero Headaches [2025]
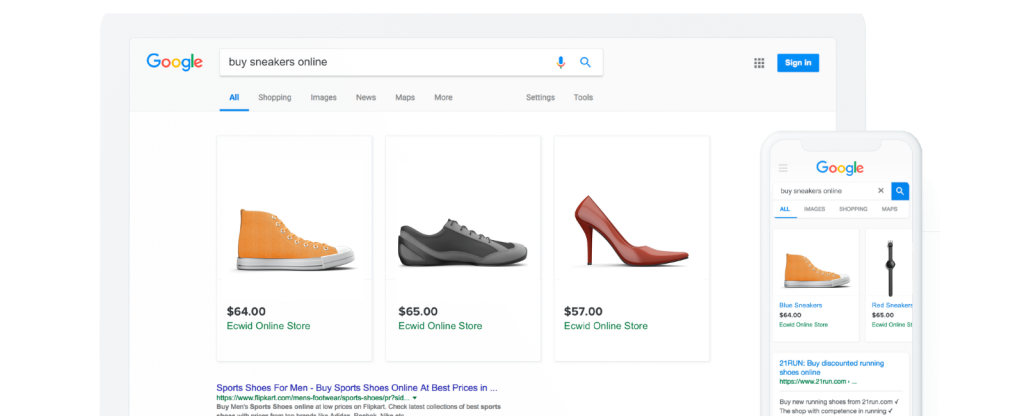
Suppose you have searched for something on Google and noticed those stylish listings made up of beautiful images driving clicks. In that case, chances are that Google Shopping Ads are doing the trick, and eCommerce brands are really raking in moolah because of it. If you’re running text-only ads, you’re missing out on one of Google’s best ad formats.
| What you’ll learn in this guide: ● Google Shopping Ads setup requirements ● How to set up Google Shopping Ads step-by-step ● How to track and key tips to create Google Shopping Ads ● Bonus: Feed setup made easy |
Requirements Before You Can Run Google Shopping Ads
1. Shopping Ads Policies
Your products, website, and promotions must follow Google Shopping Ads policies. This includes rules around return policies, checkout experience, prohibited content, and business eligibility.
2. Google Accounts
You’ll need both a Google Merchant Center account and a Google Ads account. These accounts must be linked before launching any Shopping campaign.
How to Set Up Google Merchant Center and Submit Your Product Feed?
How to Set Up Your Merchant Center Account
- Go to Google Merchant Center and create a new account: https://merchants.google.com
- Enter basic business info: store name, country, time zone
- Verify your website using:
- HTML tag
- File upload
- Google Tag Manager

- Set up shipping and tax settings based on your location
How to Add Products to Google Merchant Center
You can submit product data using any of the following methods:
- Google Sheets / File Upload: manual option for small catalogs
- Scheduled Fetch (XML URL): auto-pull from your store or CMS
- Content API: for developers or stores with frequent product updates
💡 If you’re using Shopify, skip the manual steps with FeedNexa. It automatically generates, formats, and syncs your feed to Google Merchant Center, keeping your listings accurate and always eligible.
How to Set Up Google Shopping Ads?
Standard Google Shopping ads are basically set up in two ways:
1. Google Merchant Center + Google Ads (Standard Shopping campaigns)
2. Performance Max campaigns (newer, AI-powered approach)
Now let’s break down the two options so that you can weigh which fits best for your business.
Option 1: Set Up Standard Google Shopping Ads
Step 1: Link Merchant Center to Google Ads
- Within Merchant Center, go to Settings & Tools > Apps & Services > Add service, select Google Ads, enter your Ads Customer ID, and Link.
- In Google Ads, open Tools & Settings > Data Manager > Connected products, review, and Approve the Merchant Center request.

Step 2: Create the Standard Shopping Campaign
In Google Ads, click + New Campaign (plus icon).
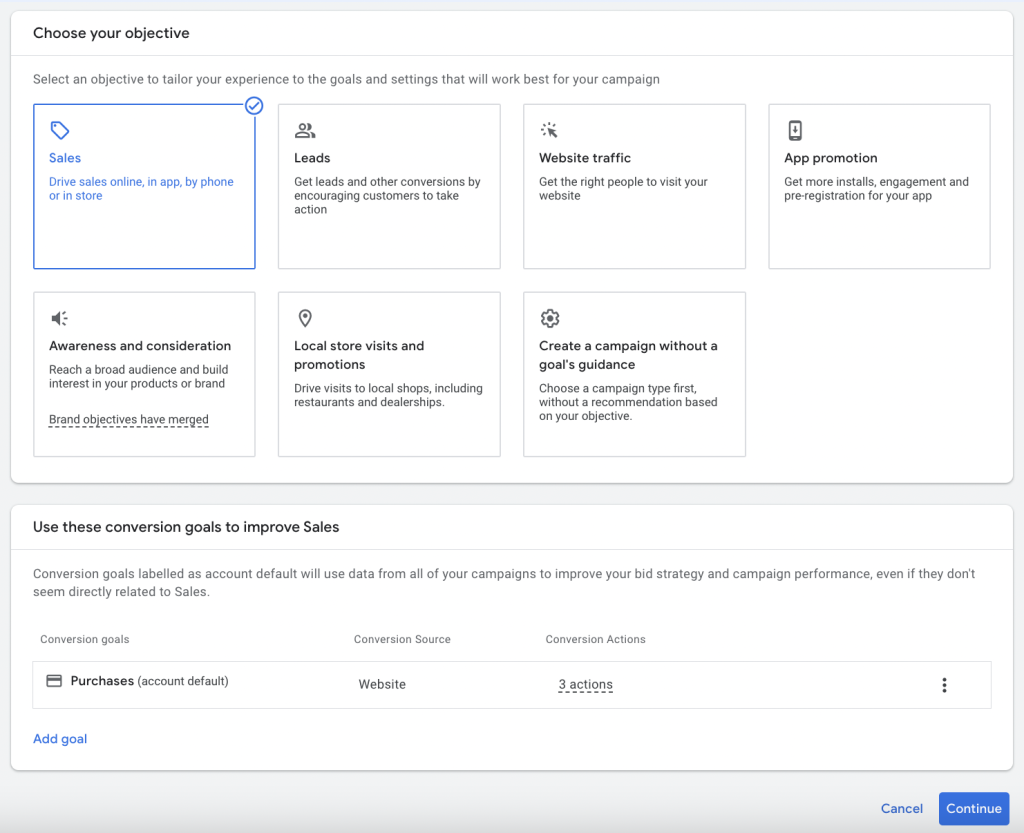
Choose an objective: Sales, Leads, or Website traffic.
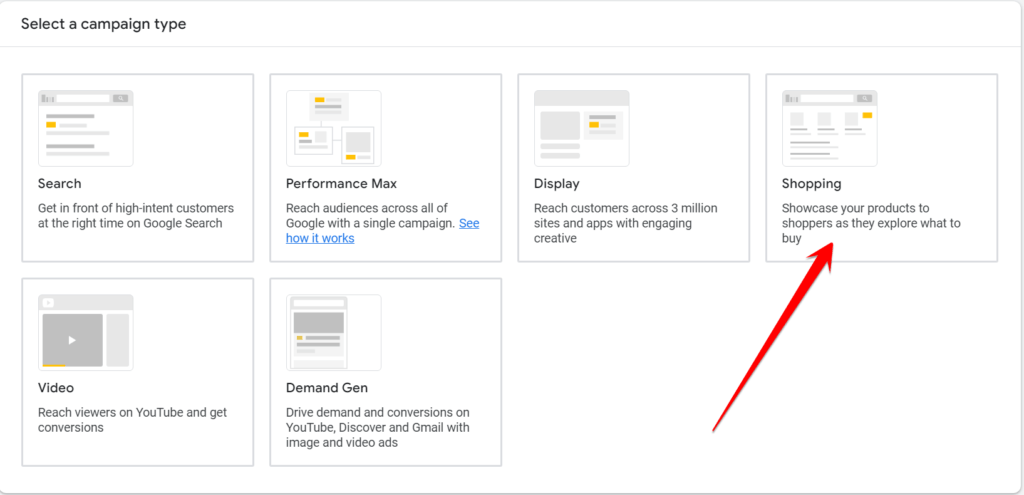
Select Shopping as the campaign type, then choose Standard Shopping campaign.
Pick your linked Merchant Center account and set the country of sale.

Name your campaign clearly (e.g., “US Shopping – Q3 2025”).
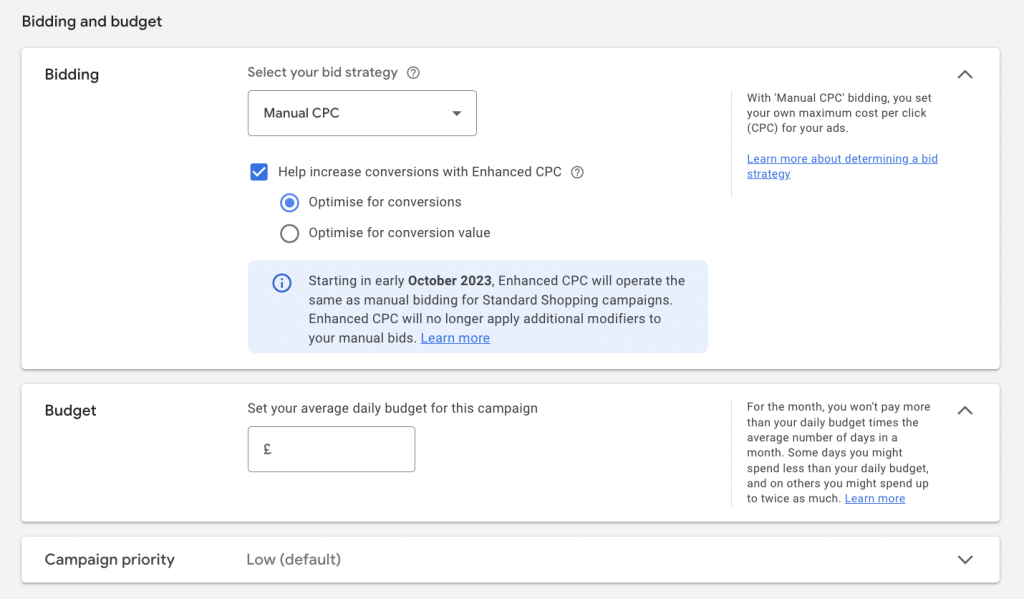
Set a daily budget and bidding strategy (Manual CPC or Smart bidding like Target ROAS later).
Choose networks (Search & partners) and device targeting.
Optionally apply inventory filters or enable local inventory ads.
Step 3: Set Up Ad Groups & Product Structure
Create at least one Product Shopping ad group.
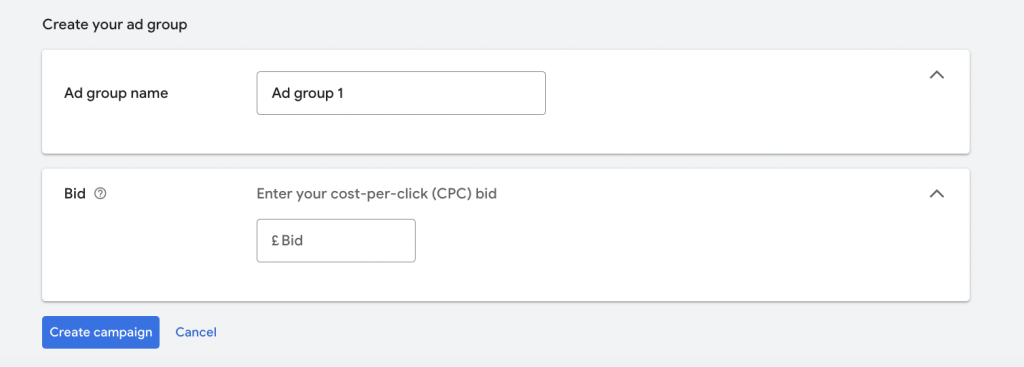
Within it, break down the products into product groups depending on category, brand, price, or custom label, which will give bid controls per segment.
Set max CPC bids for each ad/product group.
Step 4: Launch & Optimize
Review settings and hit Publish.
Watch your campaign performance from the Campaigns and Ad groups tabs, emphasizing clicks, conversions, and ROAS.
Any product feed following optimization best practices (clear product title and images, complete attributes) stands a great chance of getting a high click-through rate and eligibility.
Option 2: Set Up Google Performance Max Campaign
It’s the newer and simpler approach, probably better suited to small merchants or the user who wants the easy route.
Step 1: Create a New Performance Max Campaign
Sign in to Google Ads
Click + New Campaign
Choose your goal, for example, Sales, Leads, or Website traffic
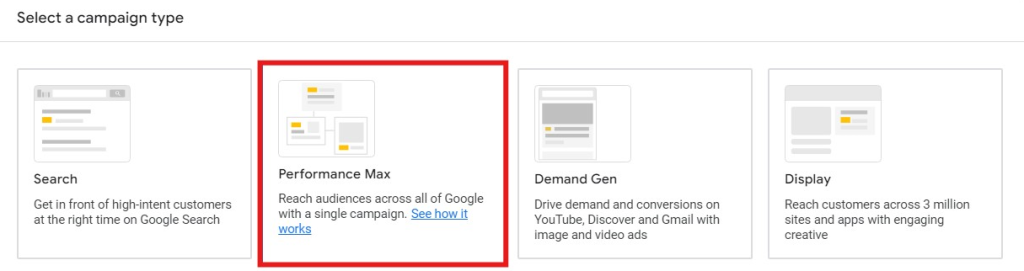
Select Performance Max for campaign type
Google will auto-import your product feed from the linked Merchant Center
Select your country of sale and continue
Step 2: Set Up Your Asset Group
This is where you build the creative bundle (text, images, and videos) for your ads. Prepare and upload:
| Final URL | Your homepage or a specific collection/product page |
| Images | Up to 15, including at least one square (1:1) and one landscape (1.91:1) |
| Logos | Up to 5 (preferably PNG with transparent background) |
| Headlines | Up to 5 (max 30 characters) |
| Long Headlines | Up to 5 (max 90 characters) |
| Descriptions | Up to 5 (max 90 characters) |
| Video | Optional but strongly recommended (YouTube-hosted) |
| Call-to-action | Choose from options like “Shop Now”, “Learn More” |
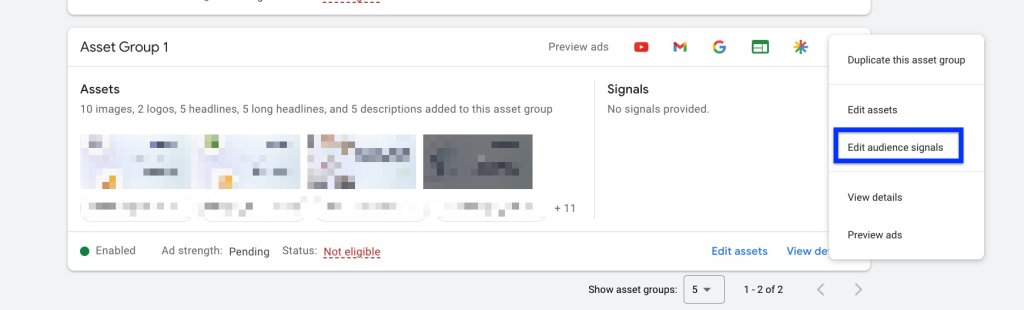
Step 3: Add Audience Signals
Audience signals help Google’s AI optimize faster, especially in the learning phase. Add:
- Custom segments: e.g., users searching for “running shoes for men”
- Your data: customer match lists, website visitors, etc.
- Demographics and interests (optional)
Note: These signals don’t limit your targeting; they guide the algorithm initially.
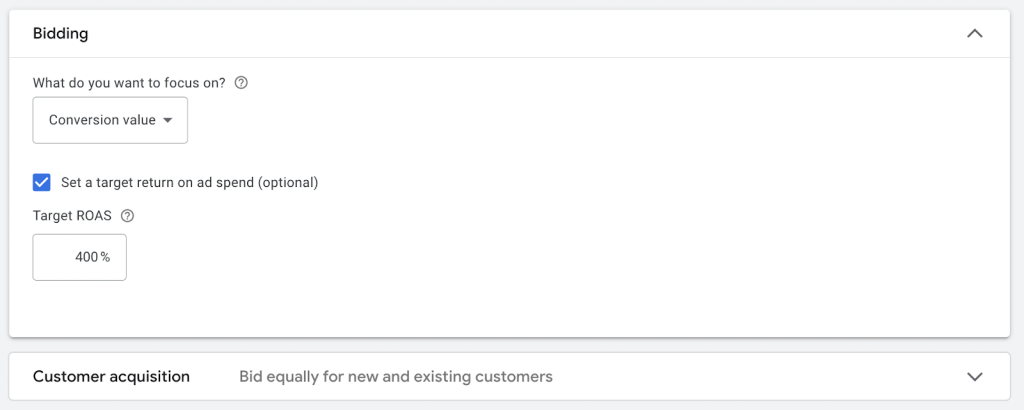
Step 4: Set Budget and Bidding
Choose your campaign budget and bidding strategy:
- Daily budget: Start with $10–$20/day to gather data quickly
- Bidding strategy:
- Maximize conversions: great for getting more sales
- Maximize conversion value: ideal if product prices vary
- Optional: Set a Target ROAS if you have historical data
Step 6: Configure Additional Settings (Optional)
Advanced controls to fine-tune your campaign:
- Ad schedule: define when your ads run
- Location and language targeting
- Content exclusions: block ads from showing on sensitive content (e.g., mature videos)
- Ad extensions: include sitelinks, promotions, or callouts
Step 7: Publish and Monitor
Review everything before publishing
Make sure your product feed is active and approved
Click Publish to launch
Track performance in the Insights tab or under Asset Group Reports
Now that you know the exact steps to launch both campaign types, let’s quickly compare Standard Shopping and Performance Max to help you decide which one fits your strategy best.
| Feature | Standard Shopping | Performance Max |
|---|---|---|
| Setup | Manual, more steps | Quick and simplified |
| Ad Placement | Search & Shopping tab only | All Google channels (Search, YouTube, Display, Gmail, etc.) |
| Creative Assets | Not required, uses product feed only | Required: headlines, images, descriptions, video (optional) |
| Bidding | Flexible (Manual CPC, Target ROAS, etc.) | Smart bidding only (Maximize conversions or value) |
| Audience Signals | Not needed | Required to help Google optimize faster |
| Control | High, full control over structure and bidding | Low, mostly automated by Google |
| Best For | Merchants who want control and product segmentation | Beginners or those who want broad reach with less effort |
How to Link Google Analytics and Set Up Conversion Tracking?
Before you start tracking results properly, you’ll want to connect your Google Analytics 4 account with Google Ads; that’s how you unlock real insights and smarter bidding.
Step 1: Link GA4 with Google Ads
In GA4, go to Admin > Product Links > Google Ads Links
Click Link, choose your Ads account, enable auto-tagging, then submit
Step 2: Import GA4 Conversions into Google Ads
In Google Ads, go to Tools & Settings > Linked accounts > Google Analytics (GA4)
Click Link, then Activate app/web metrics to sync GA4 events
Step 3: Set Up Conversions
Go to Tools & Settings > Conversions > + New Conversion Action
Select Import, choose GA4 events like purchase or sign_up, then click Import and Continue
Optional: For native tracking via GTM, use the Google Ads Conversion Tracking tag with your Conversion ID and Label
Key Tips to Keep in Mind When Creating Google Shopping Ads
Creating the campaign is one thing, but making it work takes more than just hitting “Publish.” These tips will help you avoid common pitfalls and get better results.
Optimize Your Product Feed
Strong Shopping results start with a compliant Shopping feed: include all required attributes like ID, title, description, price, availability, brand, GTIN, and correct Google product category. Keep titles under 150 characters and front-load searchable keywords.
Additionally, stay on top of annual spec changes and new rules such as mandatory AI-image metadata in 2025 to avoid disapprovals before campaigns even launch.
Use High-Quality Product Images
Based on Google shopping requirements for image, Google rejects blurry, watermarked, or tiny visuals, so upload 100 × 100 px minimum for non-apparel and 250 × 250 px for apparel, keeping files below 16 MB.
Moreover, stick to JPG/PNG under 5 MB and center the item within 80 % of the frame to hit Performance Max “Excellent” ad-strength scores.
💡Learn More: All Google Shopping Feed Specs and How to Diagnose Mistakes
Monitor Product Approvals
Check Merchant Center’s Diagnostics tab every few days; unresolved feed errors or policy violations can pull entire SKUs from auctions in just a few hours. Therefore, within 48 hours, address any disapproval or violation issues, e.g., pricing mismatch, image policy flaws, and keep your feed refresh scheduled nightly so updates get synchronized quickly.
👉 Read More: Google Merchant Center Suspension: Issue Explained and Solved
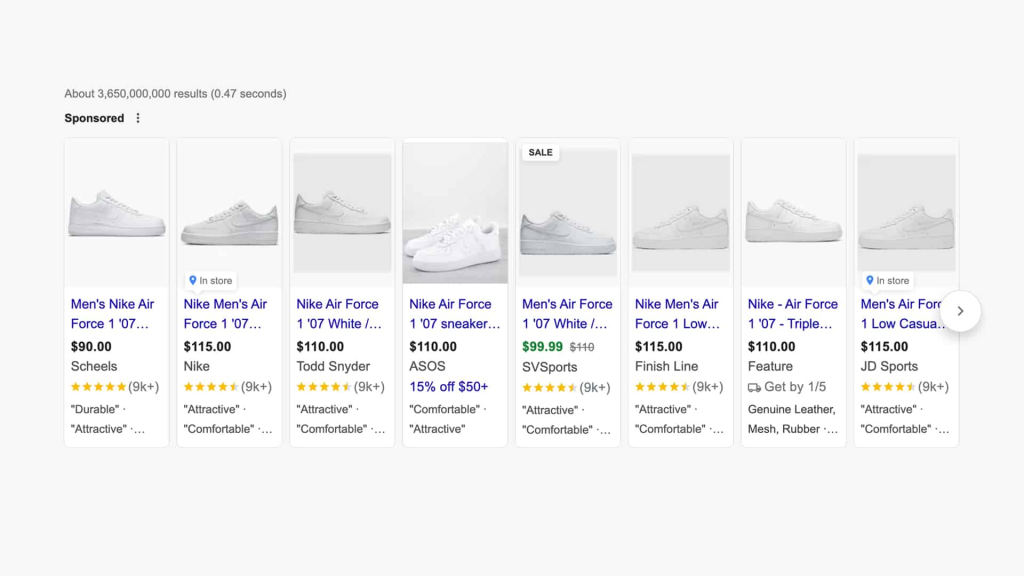
Set Competitive Pricing
Shopping ads surface next to rivals, so leverage Google’s Price Insights benchmark: aim to stay within ±5% of the market median to keep impression share.
As a result, audit prices weekly, especially during promos, and use sale_price & sale_price_effective_date attributes to highlight temporary deals without lowering your base cost.
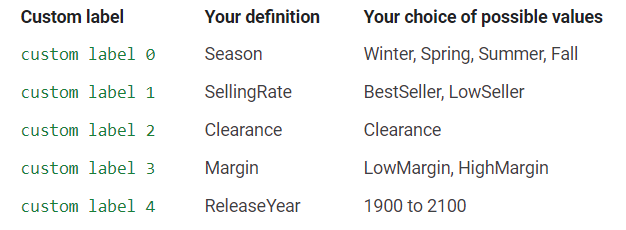
Use Custom Labels
Create custom labels such as “bestseller,” “seasonal,” “clearance,” or “margin > 30%” and then subdivide product groups to assign a higher bid to those buckets considered valuable.
Also, labels should be rotated quarterly to test bid strategies (ROAS and CPC) without having to touch the core feed structure.
Track Product-Level Performance
Beyond campaign totals, drill into Product Groups > Item ID to spot high-spend, no-sale outliers, pause or lower bids on them immediately.
Consequently, reallocate the freed budget to items with ≥ 3 % conversion rate and consider Smart Bidding only after at least 20–30 sales per SKU.
Test Both Campaign Types
Standard Shopping offers granular control, while Performance Max adds cross-channel reach and AI bidding, running both lets you hedge learning curves.
Ultimately, keep budgets siloed, monitor overlap with the Campaigns > Insights > Top Search terms report, and shift spend toward whichever model drives consistently better ROAS.
Final Thoughts
If you’ve been wondering how to set up Google Shopping ads that actually performs, it all comes down to preparation and structure. From feed optimization to campaign type selection and conversion tracking, every step plays a role in getting your products in front of the right audience.
Whether you go with Standard Shopping for control or Performance Max for automation, make sure your Merchant Center is clean, your product data is accurate, and your campaigns are optimized for conversions.